
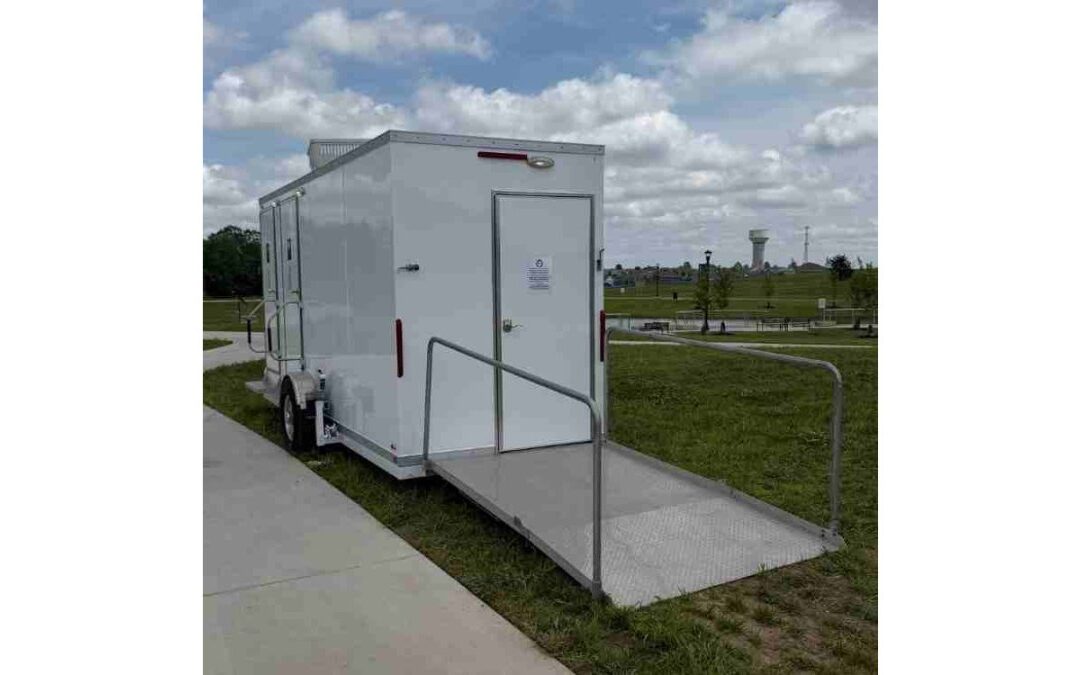
Last Updated: November 5, 2026
Quick Summary
Sanitation protocols for temporary school facilities require cleaning surfaces before sanitizing or disinfecting, staffing high-touch points several times a day, and logging every round. Build three daily rounds around usage patterns, name a backup on every shift, and keep setup, daily, and removal records in one on-site binder.
- Clean first, then sanitize or disinfect, and let products stay wet for the full label contact time.
- Schedule a morning restock, a midday check, and an after-hours deep clean with disinfection.
- Assign one named staff member per shift to check fresh water, waste tank status, and supplies.
- Place handwashing stations at every entrance, the cafeteria transition, and restroom trailer entry.
- Document delivery condition with photographs and compare them against the unit at removal.
Table of Contents
- Why Temporary School Facilities Need Their Own Sanitation Plan
- Cleaning, Sanitizing, and Disinfecting: Know the Difference
- Your Temporary School Restroom Cleaning Checklist
- Building a School Restroom Cleaning Schedule That Holds Up
- The School Restroom Supply Checklist for Trailers and Modular Units
- Handwashing and Water Access When Plumbing Is Limited
- Temporary Restrooms During School Renovation: Setup, Turnover, and Removal
- Planning Sanitation for Your Temporary School Site
- Frequently Asked Questions
Why Temporary School Facilities Need Their Own Sanitation Plan
Sanitation protocols for temporary school facilities work differently from routines in a permanent building.
The most common mistake is copying the main-building cleaning schedule onto a trailer and assuming it will hold.
It won’t. Readers planning sanitation for a school site can review the full emergency restroom trailer guide for schools to compare options and plan capacity before the first unit arrives.
Cleaning, Sanitizing, and Disinfecting: Know the Difference
These three words describe different levels of germ reduction, and mixing them up wastes supplies and leaves surfaces under-treated.
Cleaning removes dirt, soil, and organic material from a surface. Sanitizing reduces bacteria to a level public health guidance considers safe. Disinfecting kills a much broader range of organisms on a surface, but only after the surface has been cleaned and only when the product stays wet for its full contact time.
The CDC guidance on cleaning and disinfecting makes the sequence clear: clean first, then sanitize or disinfect. Skip the cleaning step and the disinfectant spends its strength on soil instead of germs.
Matching the Product to the Surface
Not every surface tolerates the same product. Read the label before anything touches a desk, handrail, or restroom fixture.
- Hard, non-porous surfaces such as desks, tables, doorknobs, and handrails accept most EPA-registered disinfectants.
- Soft or porous items such as fabric seating and some play equipment may only tolerate cleaning or laundering.
- Food-contact surfaces need a product labeled for that use and a potable-water rinse where the label requires it.
Two rules matter more than any product choice. Never mix chemicals, especially bleach with anything containing ammonia or acid (the CDC). And always wear the personal protective equipment the label specifies.
Your Temporary School Restroom Cleaning Checklist
A temporary school restroom cleaning checklist should be short enough that staff actually complete it every day, and specific enough that nothing gets skipped.
- Restock soap, paper towels, toilet tissue, and hand sanitizer before the first bell.
- Clean all high-touch surfaces with soap and water or an appropriate cleaner.
- Apply an approved disinfectant and let it stay wet for the full label contact time.
- Wipe down sinks, faucets, flush valves, and door handles in every stall.
- Inspect floors for spills and standing water, then clean and dry.
- Check waste receptacles and empty them before they overflow.
- Log the time, the products used, and who completed the round.
A written log is the part most sites drop first, and it is what shows what was done and when if an illness cluster appears.
High-Touch Surfaces and Shared Spaces
Desks, tables, doorknobs, handrails, light switches, shared keyboards, and water fountains collect more hand contact than any other school surface. In a temporary facility, add the trailer door handle, entry handrail, and step edges.
Frequency matters more than intensity. A quick clean several times a day beats one deep clean at night, because surfaces get recontaminated the moment students return.
Building a School Restroom Cleaning Schedule That Holds Up
A school restroom cleaning schedule for a temporary unit needs at least three rounds: a morning restock and wipe-down, a midday check during peak traffic, and an after-hours deep clean with disinfection.
Build the schedule around usage patterns, not the clock.
Climate control affects how the schedule performs. Read more on climate control benefits for restroom trailers if you are weighing that option.
Watch out: a schedule that names no backup person collapses the first day the assigned custodian is out. Name a second name on every shift.
The School Restroom Supply Checklist for Trailers and Modular Units
A school restroom supply checklist should cover consumables, cleaning products, and the equipment staff need to do the work safely.
| Category | Items to Stock | Restock Trigger |
|---|---|---|
| Hand hygiene | Foam soap, paper towels, hand sanitizer | Below one-quarter in any dispenser |
| Restroom consumables | Toilet tissue, seat covers, liners | Daily count against expected traffic |
| Cleaning products | EPA-registered disinfectant, neutral cleaner, glass cleaner | Half-container mark |
| Tools | Microfiber cloths, mops, spray bottles, labeled buckets | After each deep clean |
| Safety | Gloves, eye protection, chemical labels, safety data sheets | Before each new product |
| Waste | Lined receptacles, spare liners, sealed bags | Every service round |
Keep the safety data sheets in one binder on site. Anyone handling a chemical should be able to find the sheet in under a minute.
Once the checklist is set, the next step is matching equipment to your site. You can view the trailer models and features to see which configurations fit your enrollment and layout.
Handwashing and Water Access When Plumbing Is Limited
Hand hygiene is the highest-value sanitation practice on any school site, and the one most likely to fail when a temporary facility has no utility connection. Most general school-cleaning guides assume a working sink in every room. Reliable water access and clear wastewater procedures make maintaining hygiene standards possible even when a temporary school site lacks the infrastructure of a permanent building.
Map Your Water Source Before You Map Your Sinks
Walk the site and answer four questions in writing before the first unit arrives:
- Is there a potable water connection? A hose bib is not automatically potable. Confirm with the site’s facilities contact that any connection feeding handwashing or a trailer is rated for drinking-water use and protected from backflow.
- Is there a sanitary sewer connection, or will waste be held and pumped? Holding-tank units rely on scheduled servicing; sewer-connected units rely on the connection staying intact through the rental.
- What is the power arrangement? Pumps, water heaters, lights, and climate control all draw power. A trailer that loses power loses running water and lighting, which shuts down handwashing entirely.
A restroom trailer with running water can solve much of the handwashing problem on its own, because water and waste are handled with the unit rather than depending entirely on site plumbing. Confirm the exact water and waste setup for the unit you are considering. For jobsites without utility connections, you can explore tank box rental and sales to see how water and waste are handled.
Place Handwashing Where Hands Actually Are
The most common placement mistake is clustering every station next to the restrooms. Students touch door handles, handrails, shared keyboards, and lunch tables long before they reach a restroom. A practical layout puts a handwashing station or sanitizer dispenser at:
- Every entrance and exit to the temporary classroom or modular unit.
- The transition between the classroom and the cafeteria or lunch area.
- The restroom trailer entry, with a second station inside if the unit supports it.
Hand sanitizer is a backup, not a replacement. Soap and water remain the standard wherever hands are visibly soiled, after restroom use, and before eating (the CDC). Sanitizer earns its place at doorways and transition zones where a sink is not practical.
Assign One Person to Water and Waste
Water and waste levels are the failure point most sites miss, because no one owns the check. Assign one named staff member per shift to confirm fresh water levels, waste tank status, soap and towel supply, and that all fixtures drain.
Watch out: a site that assumes the custodian will “notice” a full waste tank usually finds out during the busiest part of the day. Put the check on the daily log with a signature, not on a mental list.
Plan for the Day the Water Stops
Every temporary site needs a contingency plan for a failed connection, a frozen line, a power outage, or a missed pump-out. Keep a written fallback that names:
- The nearest permanent restroom or handwashing sink on campus and how students will be routed to it.
- A stocked backup of hand sanitizer, bottled water for handwashing where permitted, and paper towels.
- The after-hours contact for the rental provider’s service team.
That plan belongs in the same binder as the safety data sheets, and it should be reviewed with staff before the first day of occupancy, not after the first problem.
If you are still deciding between a plumbed trailer and a tank-based setup, our team can walk through ADA-accessible restroom trailer options and the water and power arrangements each configuration needs.
Temporary Restrooms During School Renovation: Setup, Turnover, and Removal
Temporary restrooms during school renovation need sanitation built into three moments: before the unit is occupied, every day it is in service, and when it leaves the site. Most cleaning guides stop at the daily routine. Setup and removal are where temporary facilities differ most from a permanent building, and where a written protocol saves the most trouble.
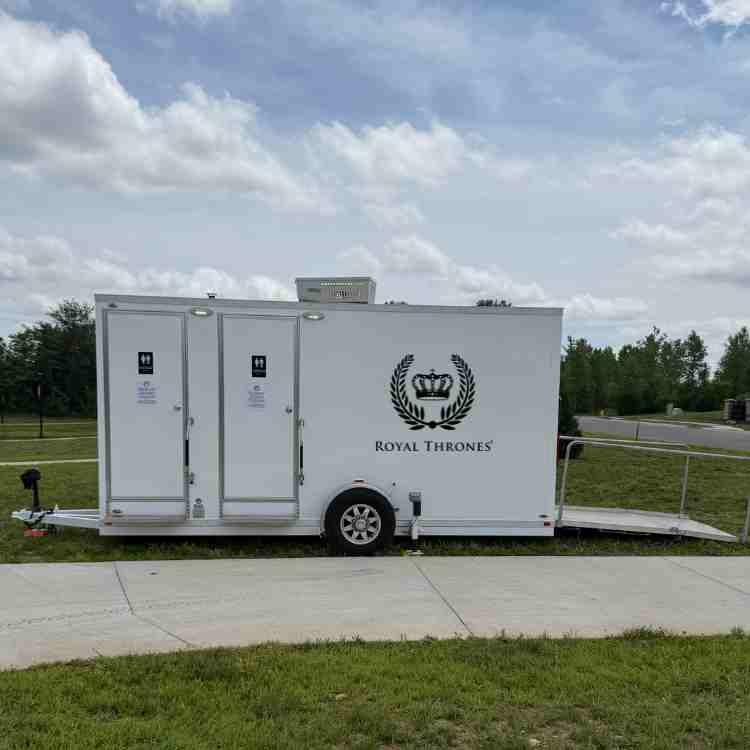
Setup: Sanitize Before the First Student Walks In
A trailer or modular restroom that arrives on site has been transported, connected, and handled by delivery staff. Treat it as unverified until it has been cleaned and inspected.
Pre-occupancy checklist:
- Confirm the pad is level, firm, and clear of active construction traffic, with safe entry and exit paths for students.
- Verify power and water connections match what the site can supply, and that any potable water line is protected from backflow.
- Confirm waste handling, sewer connection secured or holding tank ready for service.
- Clean every interior surface with soap or an appropriate cleaner, then disinfect high-touch points: door handles, handrails, flush valves, faucets, dispensers, light switches, and step edges.
- Restock soap, paper towels, toilet tissue, seat covers, and hand sanitizer.
- Confirm lighting, ventilation, and climate control are working, since a unit that stays dry and comfortable holds up better between cleanings.
- Record the date, the products used, and who completed the setup clean. File it with the site’s sanitation log.
Document the condition of the unit at delivery as well, photographs of the interior and exterior, plus a note of any pre-existing damage. That record protects both the school and the rental provider at removal.
Turnover: Daily, Midday, and After-Hours Rounds
Once the unit is in service, sanitation runs on three rounds: a morning restock and wipe-down before the first bell, a midday check during peak traffic, and an after-hours clean with disinfection. Build the midday check around usage patterns rather than the clock, lunch, recess, and class changes put the heaviest load on a trailer in a fifteen-minute span, so a staffed check immediately after each window matters more than an evenly spaced schedule.
During heavy demolition or construction, increase the midday check and add a quick wipe of entry handrails and door handles, since dust and debris travel into the unit on shoes and hands.
Watch out: a schedule with no named backup collapses the first day the assigned custodian is out. Put a second name on every shift and confirm they know the routine.
Removal: Clean, Document, and Release
When the rental ends or the unit is relocated, sanitation does not stop at the door. A unit that leaves dirty creates problems for the next site and can complicate the school’s own closeout.
Pre-removal checklist:
- Complete a final clean and disinfection of all interior surfaces and high-touch points.
- Confirm waste has been pumped or the sewer connection has been properly disconnected by the responsible party.
- Remove and dispose of leftover consumables, or hand them back to the school’s supply inventory.
- Photograph the interior and exterior and compare against the delivery record.
- Note any damage or excessive wear and share it with the rental provider before the unit is moved.
- If the unit served a site with a known illness outbreak, follow the disinfection guidance for contaminated areas before release, and document the products and contact times used.
Keep One Binder for the Whole Lifecycle
The setup record, daily logs, delivery and removal photographs, safety data sheets, and contingency plan all belong in one binder on site.
For the full logistics picture, including placement, servicing, and scheduling, our team put together a guide on temporary restroom trailers for school renovations. If your project is part of a larger building closure or renovation, the business remodel restroom page walks through the same setup and servicing decisions from a facility manager’s point of view.
Planning Sanitation for Your Temporary School Site
Everything else, from supply lists to schedules, supports those four. Get them right and a trailer or modular unit can hold a healthy learning environment as well as any permanent restroom on campus.
Tell Royal Thrones your location, dates, expected student and staff count, and how long you need the unit. We will help you choose the right trailer for the site and prepare a quote.
Frequently Asked Questions
What sanitation protocols should temporary school facilities follow?
Start with a written plan that names who cleans what and how often. Clean visible soil with soap and water first, then apply an EPA-registered disinfectant to high-touch surfaces such as doorknobs, handrails, faucets, and flush handles, following the label’s contact time. Restrooms need daily cleaning at minimum, with a mid-day check on busy days. Handwashing stations or sanitizer must be available wherever students and staff gather. Keep a simple log so administrators can see the work was done, and review the plan whenever the site layout changes.
How often should temporary school restrooms be cleaned?
Plan on at least one full clean per school day, plus a mid-day touch-up if the unit serves a large population or sits near the cafeteria. Trailers with running water and climate control hold up better between visits, but they still need the same daily routine: restock soap and paper, wipe high-touch points, and check the floors. During an illness outbreak, increase frequency and focus on shared surfaces. Build the schedule around your actual bell times so cleaning does not collide with passing periods.
What supplies should be available in temporary school restrooms?
Stock soap, paper towels or hand dryers that work, toilet paper, and a lined waste receptacle in every unit. Add hand sanitizer at entrances and in classrooms where sinks are scarce. Keep a small cleaning kit on site with gloves, a EPA-registered disinfectant, paper towels, and a spray bottle labeled with its contents. Post a restock checklist inside each unit so staff can flag low supplies before they run out, not after.
Who is responsible for cleaning temporary school restrooms?
Assign one named person per shift, plus a backup. That may be your custodial staff, a contracted cleaning crew, or the rental provider’s servicing team depending on your agreement. Write the responsibility into the site plan and post it where staff can see it. Whoever holds the job should sign a daily log and report damage or supply shortages the same day. Vague ownership is the most common reason temporary restrooms slip, so make the name visible.
How can schools manage handwashing when facilities are temporary?
Count your sinks before the first school day and compare that to your enrollment. Where sinks are short, place hand sanitizer stations at every classroom door and at the entrance to each restroom trailer. Restroom trailers with running water give students a real sink, which matters more for younger children and after art or lunch. Teach the 20-second handwash routine during the first week, and keep soap stocked so the habit holds.
What should a school sanitation checklist include during a renovation?
Cover four areas: restrooms, classrooms, shared spaces, and supplies. For restrooms, list high-touch points, restocking, and floor care. For classrooms, list desks, tables, and shared devices. For shared spaces, include handrails, door handles, and cafeteria tables. For supplies, list soap, paper, sanitizer, and disinfectant with par levels. Add a sign-off column and a place to note repairs. Review the checklist weekly during the project and update it when the site layout changes.
A temporary facility only stays clean if someone owns the schedule and someone else can step in when they are out. Royal Thrones supports school sites with climate-controlled restroom trailers, ADA-accessible units, and 24-hour service availability so sanitation does not stall when something goes wrong. Get started with Royal Thrones and give your students and staff dependable restroom access through the whole project.
